|
|


Do-it-Yourself
PVC Overflow with Multi-Level Intake
page 3 of 5
PVC Overflow with Multi-Level Intake
page 3 of 5
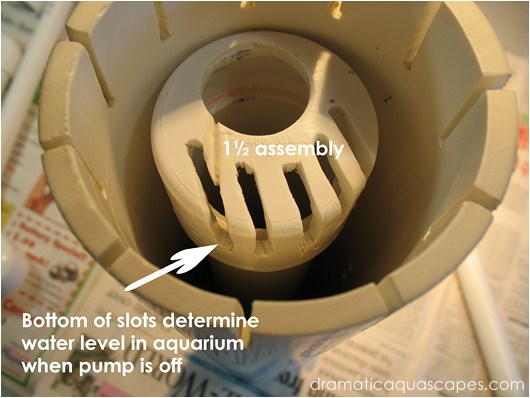
Something to consider before cementing the
1½ assembly in place:
* For reference, setting the top edge of the 3" PVC pipe at the water surface, the position of the 1½ assembly determines how much water will continue to flow to the sump in the event of a power failure. In larger aquariums, a 1/2" up or down can represent a few more or less gallons of water your sump will need to hold.
The general guideline is to mount the 1½ assembly higher to lower the capacity requirement of your sump. Mount the 1½ assembly lower to increase the capacity requirement of your sump.
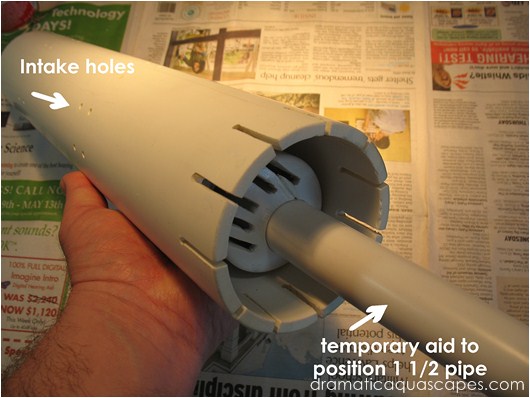
* Using the 3/4 temporary pipe, navigate the 1½
pipe assembly into the 3" pipe and allow the
cement to contact the side opposite the water
intake holes. Allow the pieces to stay in this
position for several minutes while the cement
cures.
* The top of the 1½ pipe assembly should be mounted at least 1/2" below the top edge of the 3" pipe.
* The top of the 1½ pipe assembly should be mounted at least 1/2" below the top edge of the 3" pipe.
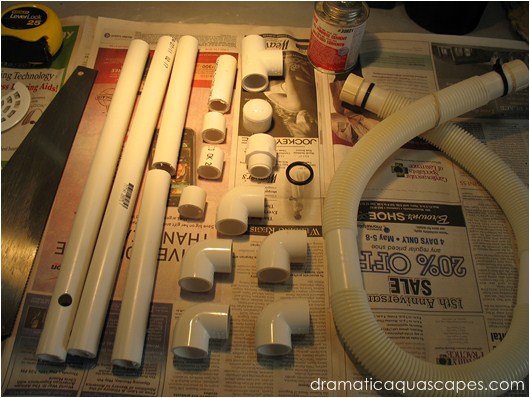
* Cut the following quantities/lengths of 3/4"
pipe:
2 x 16", 2 x 8", 1 x 3", and 3 x 1".
* Drill an extra hole or two in the bottom few inches of one of the 16" pipe sections. The extra holes will improve water flow into the pipe.
Note: How low you drill the extra holes are in the pipe will play a role in how well the overflow maintains it's siphon whenever water levels change quickly in the aquarium.
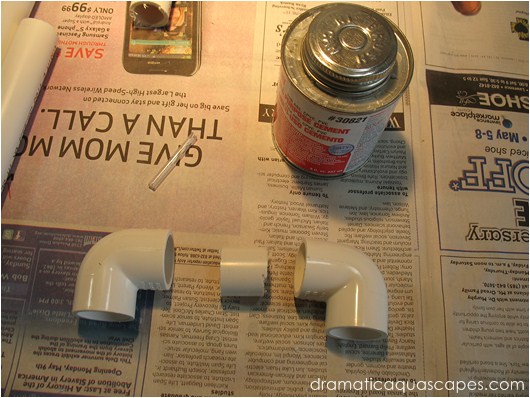
* Cement two elbows together in a "U" shape
using one of the 1" pipe sections.
Note: Each elbow has a seam on the side you can use as reference to make sure the elbows are lined up.
Note: Each elbow has a seam on the side you can use as reference to make sure the elbows are lined up.
* Once the cement has had a few minutes to
cure, drill a 3/16" hole in the top of one of the
elbows.
* Insert a 1" section of 3/16" rigid tubing. Before cementing in place, flip the elbow over to see how far the rigid tube goes thru. The tube will be used to draw out any trapped air in the pipe once your overflow is in operation, so the end of the 3/16" rigid tube should be flush with the inside surface of the elbow. You may want to use a toothpick to apply the cement in this step.
* Insert a 1" section of 3/16" rigid tubing. Before cementing in place, flip the elbow over to see how far the rigid tube goes thru. The tube will be used to draw out any trapped air in the pipe once your overflow is in operation, so the end of the 3/16" rigid tube should be flush with the inside surface of the elbow. You may want to use a toothpick to apply the cement in this step.
welcome to
do-it-yourself aquarium and semi-aquatic background designs beyond the traditional
Dramatic AquaScapes
Disclaimer: Exercising reasonable safety precautions
when performing the steps described in this article
are the responsibility of the individuals building the
background. Dramaticaquascapes.com is not
responsible for personal injury or property damage as
a result of following steps outlined in this article.