|
|
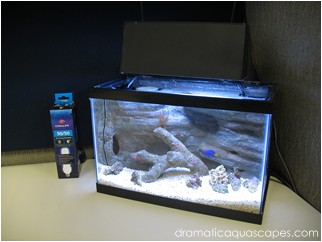
Converting this 2.5 gallon desktop aquarium from a freshwater Betta tank to a
mini marine tank was done in a pretty traditional fashion, however, any marine
aquarist knows a successful marine setup is very much about the right kind of
lighting.
This project details the lighting solution this weekend do-it-yourselfer found to work very well for this mini marine aquarium for the office.
This project details the lighting solution this weekend do-it-yourselfer found to work very well for this mini marine aquarium for the office.
Mini 10,000k / Actinic
Compact Fluorescent
Hanging Light Fixture
Compact Fluorescent
Hanging Light Fixture
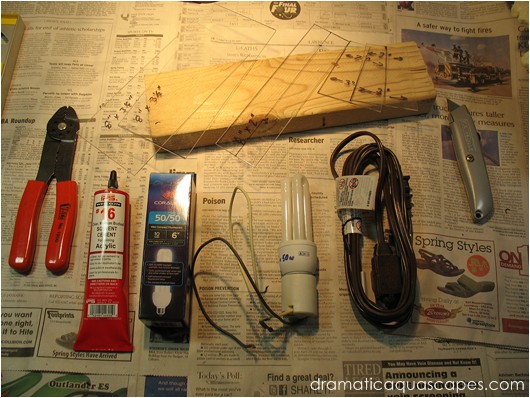
Tools:
- Crimper tool and two nylon crimp caps.
- A utility knife
- Magic Marker
- Sandpaper
- straight edge ruler
Materials:
- Acrylic cement (IPS #16 Acrylic Cement shown)
- Coralife 50/50 Mini-Compact Fluorescent Lamp
- Ceremic medium bulb socket
- 6' extension cord
- Some extruded or cast acrylic sheet
- Black and Chrome spray paint
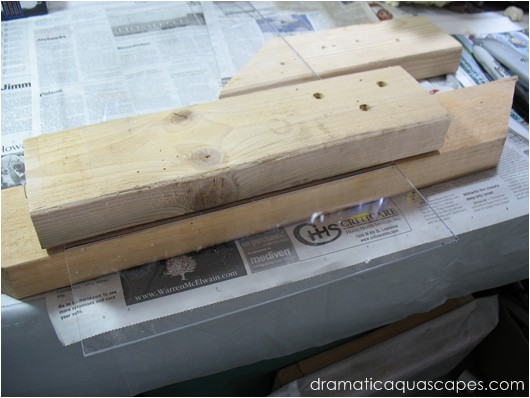
The acrylic sheet secured between the pieces of
2x4 lumber was purchased at a local hardware
store in the glass (window) section.
Sheets of extruded acrylic are available in a variety of sizes.
Before placing the sheet between the lumber, A line was measured and marked to be 3 1/2 inches wide. The goal in this step was to end up with two pieces of acrylic 8 inches long by 3 1/2 inches wide.
The pieces were cut by using a utility knife to score the acrylic along the line so when downward pressure was applied to the area of acrylic extending from the wood, it would separate at the scored line. Notice the black marker line is carefully lined up with the edge of the wood.
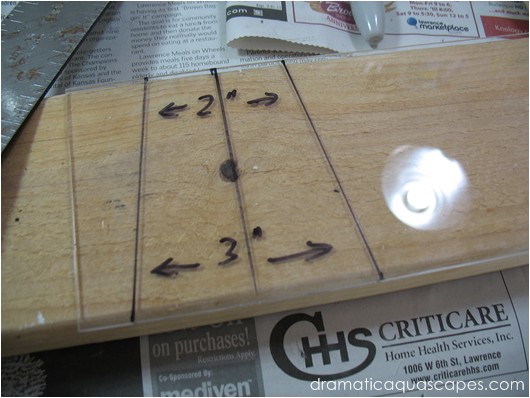
Two additional pieces of acrylic were
measured and cut to be 2 inches wide at the
top and 3 inches wide at the bottom.
The line going down the center was just for measurement purposes and was not cut.
These two pices would become the end pieces of our hanging light fixture.
Just one of two is shown in the photo.
The line going down the center was just for measurement purposes and was not cut.
These two pices would become the end pieces of our hanging light fixture.
Just one of two is shown in the photo.
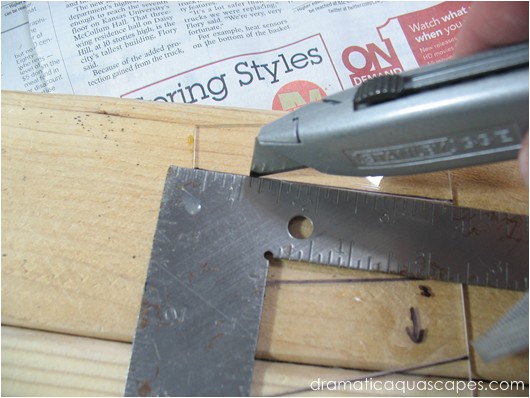
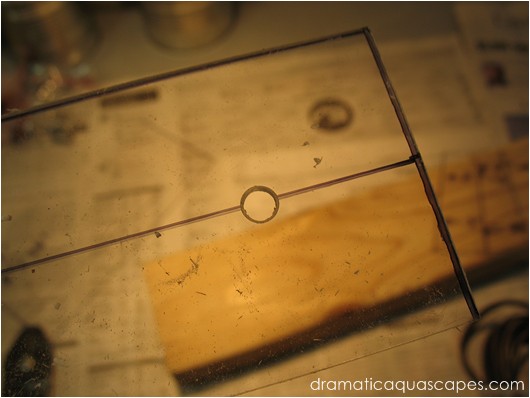
This photo shows how the utility knife is being
used to score the acrylic. The acrylic end
pieces were also placed between the lumber to
control where the acrylic separates (breaks)
when downward pressure is applied.
This photo shows the 2 inch by 8 inch top piece
with a center line drawn for measure.
Holes were drilled about an inch from each end of the top piece which will be used to route the extension cord thru.
A step drill bit was used to cut the holes.
Holes were drilled about an inch from each end of the top piece which will be used to route the extension cord thru.
A step drill bit was used to cut the holes.
Page 1 of 3
welcome to
do-it-yourself aquarium and semi-aquatic background designs beyond the traditional
Dramatic AquaScapes