|
|


My husband Dan and I have had a 200 gallon aquarium for 16 years, however
we have not had water or fish in it for about 5 years.
Page 1 of 3
Our 200 Gallon
DIY Aquarium Background
by
Dan and Becky Topp
Des Plaines, Illinois
DIY Aquarium Background
by
Dan and Becky Topp
Des Plaines, Illinois
We did a large remodel of our home and after losing our discus to a mishap (water change gone bad) we decided to shut the
tank down for a while until the remodel was done. The remodel took longer than expected and we are just now getting the tank
going again. In mid January 2011, my husband was searching YouTube for ideas for a background for our tank.
After we saw some of the examples of what people had done with backgrounds, I did some further searching and came across Dramatic Aquascapes and just loved the work Glenn had done.
After we saw some of the examples of what people had done with backgrounds, I did some further searching and came across Dramatic Aquascapes and just loved the work Glenn had done.
welcome to
do-it-yourself aquarium and semi-aquatic background designs beyond the traditional
Dramatic AquaScapes
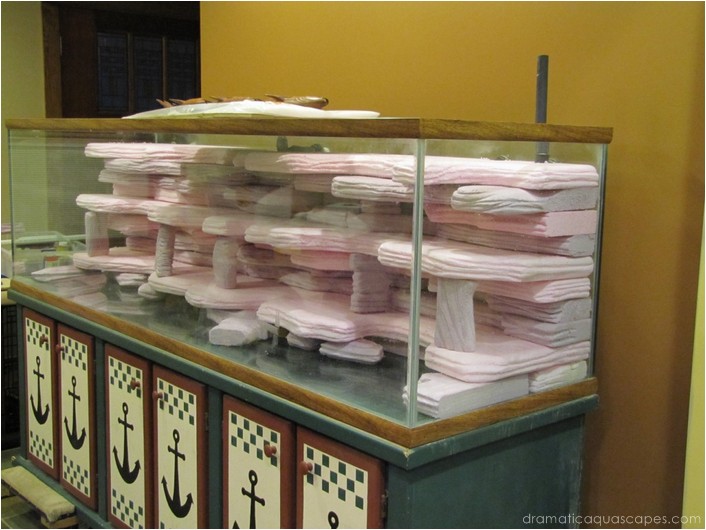
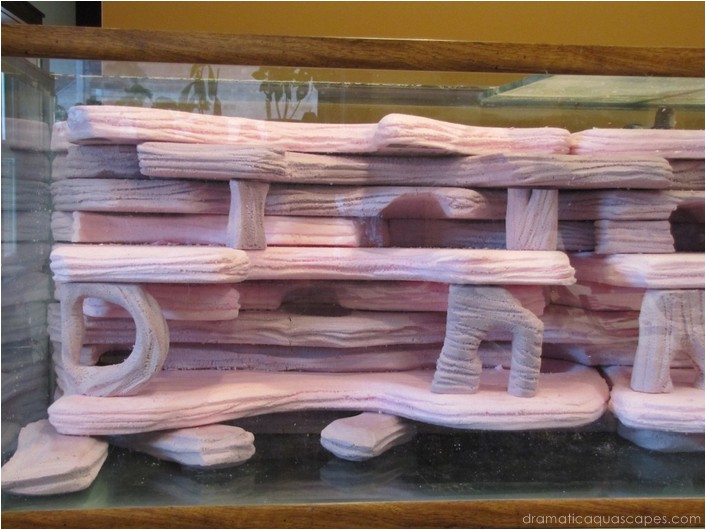
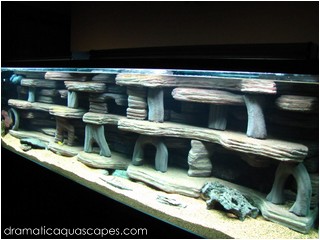
I decided to use 2” pink insulation and my goal
was to make something as real looking as
possible. I also wanted to create a lot of caves
and crevices for the fish to hanging out in.
I drew out the large shapes on the insulation board and my husband cut them out with his portable Milwaukee Hackzall. I spent hours and hours sanding each piece with 60 grit sandpaper to get the pieces to look like layered rocks. I learned the hard way that one should wear gloves when using 60 grit sandpaper. Also, sanding this stuff is a huge mess! It is like opening a beanbag chair.
The little pieces of insulation are statically charged and stick to everything – even my poor dogs! I would also recommend wearing a dust mask when sanding this stuff.. I actually would have preferred to do this job outside, however it was in the dead of winter in Chicago.
It took me about a month of working on the
pieces after work and on the weekends to get
everything shaped just right. I placed everything
in the tank and had it all ready to go. I then had
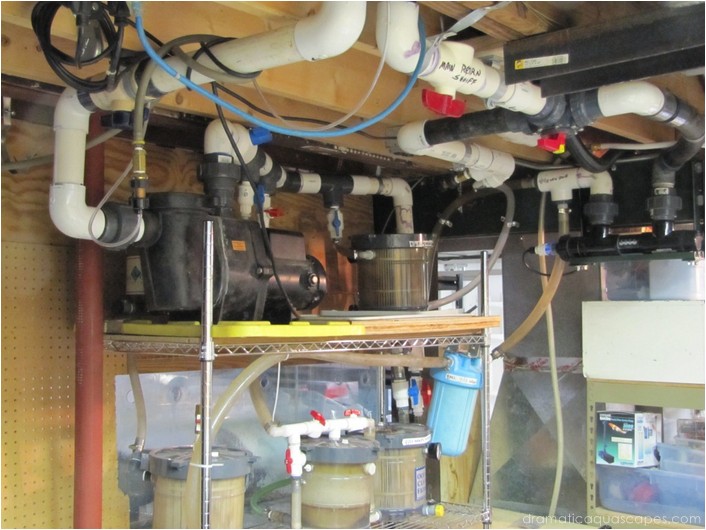
to wait for my husband to get all the plumbing
done. We have a system that circulates to the
basement below the tank and runs through the
pump, several canister filters, and a UV filter.
The system also includes the ability to easily
add fresh filtered water.
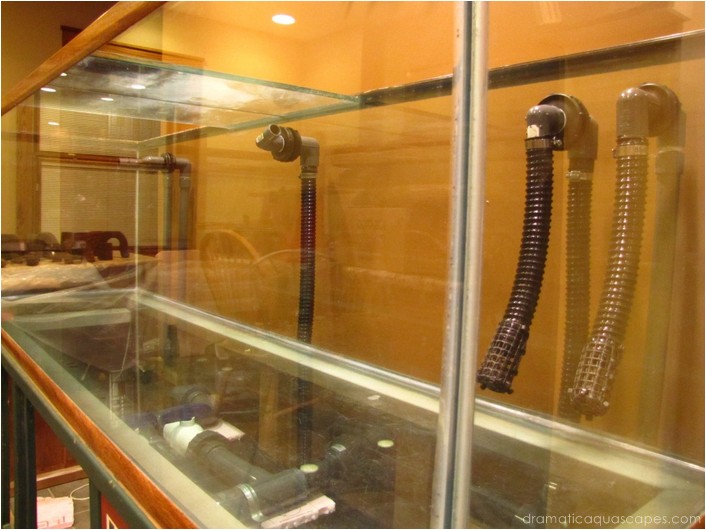
This works out great as the mess and noise is all downstairs in the basement. My husband had already drilled holes in the tank for the previous set up, but had decided he wanted to go with bigger pipe this time. This meant we had to order the proper bits and bulkhead fittings and drill the holes larger. It was a bit nerve racking helping him drill the rather large holes, but it all worked out.
There are two pipes for the return on the right and two more pipes on the left for the supply. In the middle of the tank is the all important overflow. This is an absolute must when you have a closed system with the ability to add fresh water! Believe me, we learned that the hard way! Also mounted under the tank is a 650 watt inline heater. Another month later all the piping was done I could finalize all of the pieces and start coating them.
Community
Spotlight
Spotlight
the