|
|

Do-it-Yourself
PVC Overflow with Multi-Level Intake
page 4 of 5
PVC Overflow with Multi-Level Intake
page 4 of 5
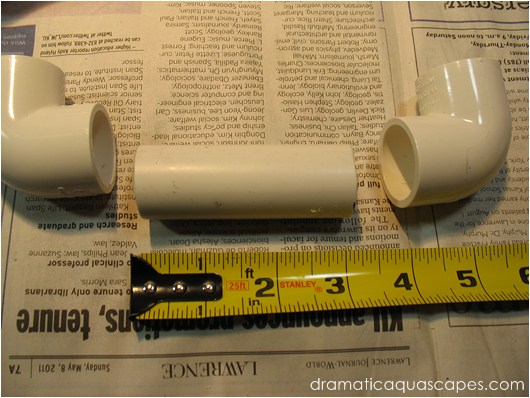
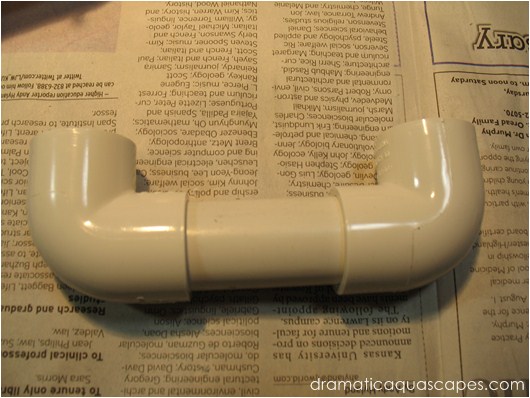
* Assemble two more 3/4" elbows to the 3"
section of pipe with cement.
* Since the elbows don't touch for easy lineup
with the seams, immediately after cementing,
lay the assembled piece on the table, and press
down to help insure the elbows are straight.
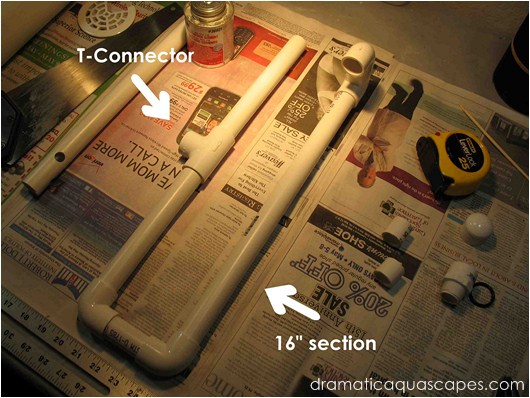
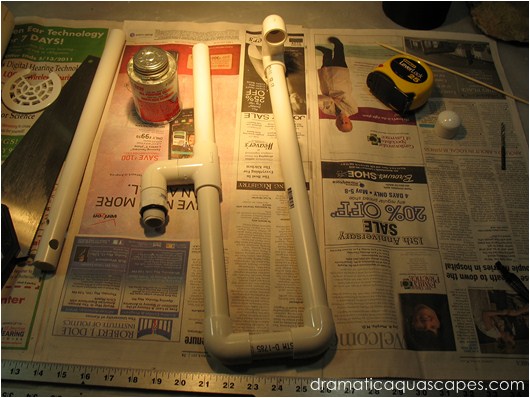
* Cement the two 8" long 3/4 PVC sections to
the T-Connector, then the two previously
assembled elbow sections to a 16" pipe
section. Note the position of the elbows.
The assembly in this photo will go behind your aquarium. The short elbow assembly will go over the top of the back of your aquarium.
The assembly in this photo will go behind your aquarium. The short elbow assembly will go over the top of the back of your aquarium.
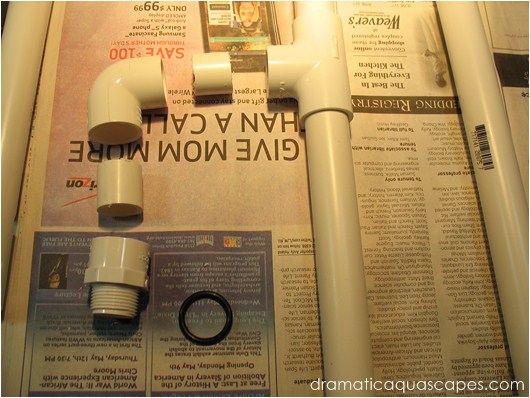
* Cement two 1" pipe sections, an elbow and
the 3/4 " slip & thread adapter together.
* After cementing, immediately press the assembly against the table to help make sure the parts are straight. Don't cement the
rubber o-ring.
* After cementing, immediately press the assembly against the table to help make sure the parts are straight. Don't cement the
rubber o-ring.
* At this stage, your assembled 3/4" overflow
sections should look something like the photo
above.
* Slip the rubber o-ring over the threaded side of the 3/4" slip & thread adapter.
* Slip the rubber o-ring over the threaded side of the 3/4" slip & thread adapter.
welcome to
do-it-yourself aquarium and semi-aquatic background designs beyond the traditional
Dramatic AquaScapes
Disclaimer: Exercising reasonable safety precautions
when performing the steps described in this article
are the responsibility of the individuals building the
background. Dramaticaquascapes.com is not
responsible for personal injury or property damage as
a result of following steps outlined in this article.

